FILTER AP 01 INNOVATIONS
This Tutorial was written for those that have a working knowledge of PSP.
Please do not copy it in anyway or claim its as your own.
Any resemblance to any other tut is purely coincidental.
This Tutorial was written on April 9th,2018
The tutorial was written and Created by Chiqui
Any resemblance to any other tut is purely coincidental.
This Tutorial was written on April 9th,2018
The tutorial was written and Created by Chiqui
For This Tutorial I used PSP X2
SUPPLIES
A Font of choice
Filter AP 01 Innovations is a free filter you can download Here
Check for copyright before use.
Let's get started
This
filter consists of a total of 26 effects, which allow us to change the
appearance of an image to make lines, lattices, Mapped checkers effect that
turns a cloth into a chessboard, reflection effects, distortion effects, noise
effects, etc.
Open a new raster 851 x 310 pixels
white background.
This is the size for a Face time banner.
Select 2 colors of your tube
Make a
linear gradient, at an angle: 45, repetitions: 2, invert without marking.
Fill your raster with this gradient.
Effects /
Accessories / AP 01 Innovations / Color-Nightmares with this settings:

-
Reflection effects / Kaleidoscope with theseSettings:

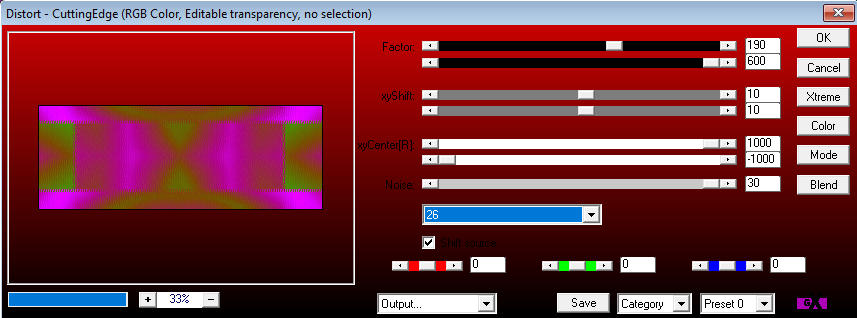
Now go to Effects /
Complements / AP 01 Innovations / Distort-CuttingEdge
with these settings:
Now we are going to apply
Effects / AP 01 Innovations / Distort-ShiftMesh with this settings:

Go to adjust- sharpen - unsharpen mask with this settings:

Copy and paste your misted image
Position where you like
copy and paste your tube and put on the left
of your banner.
New raster layer
fill with a contrast color in this case I use white
Now We are going to apply
Effects
/ Add-ons / AP 01 Innovations / Distort-WavyCutwith this settigns:

Click inside of one square
then click delete
Selections all-float defloat - selection invert
add a drop shadow with this settings:
2-2-50-5
Go to selections tools and make and make this
custom selections
(this works if ypur tube is posisioned like mine. If not, you need to do
your own selection)

delete- selections none
Click in your warp brush tool

with this settings
click on apply like this:

Now click carefully in the part you delete before
deforming like you want. Use little clicks.
Layer merge- merge visible
Effects- xero- bad dream with this settings:

Layer new raster layer
fill with the same gradient you create before
selections all-selections modify contract by 10
Change the properties to overlay.
Layers new raster
fill with a Light color of your choice
selections all-modify- contract by 1
delete
Add the copyright
Layers merge visible
Write your name or phrase you want
Save as a .png.
My result:


1 comment:
Esta bello él tuto gracias
Post a Comment