KIWI SAUCE
This Tutorial was written for those that have a working knowledge of PSP.
Please do not copy it in anyway or claim its as your own.
Any resemblance to any other tut is purely coincidental.
This Tutorial was written on May 3th,2018
The tutorial was written and Created by Chiqui
Any resemblance to any other tut is purely coincidental.
This Tutorial was written on May 3th,2018
The tutorial was written and Created by Chiqui
For This Tutorial I used PSP X2
SUPPLIES
Tube of your choice
I am using the awesome artwork of Alex Prihodko
You need a license to use this tube, do not use without a license.
You can find this tube at VERYMANY store HERE
A image of your choice I used Spring Rain
by Valerie Monthuit
She has beautiful images!
you can found
Please leave some love and thank you.
Font of choice
I used Lovely Day font regular free font Here
Drop shadow is usually V-2 H-2 Black, 50, 5, use what you prefer.
Let's get started
Open a new image 851 x 310 pixels
White Background
Choose 2 color of your tube
and do a gradient with this settings:
Lin near - repeat 2 invert not checked
Fill your raster with the gradient
Adjust- Blur- Gaussian Blur - 30
go to Effects- Kiwi's effects - videowand with this settings
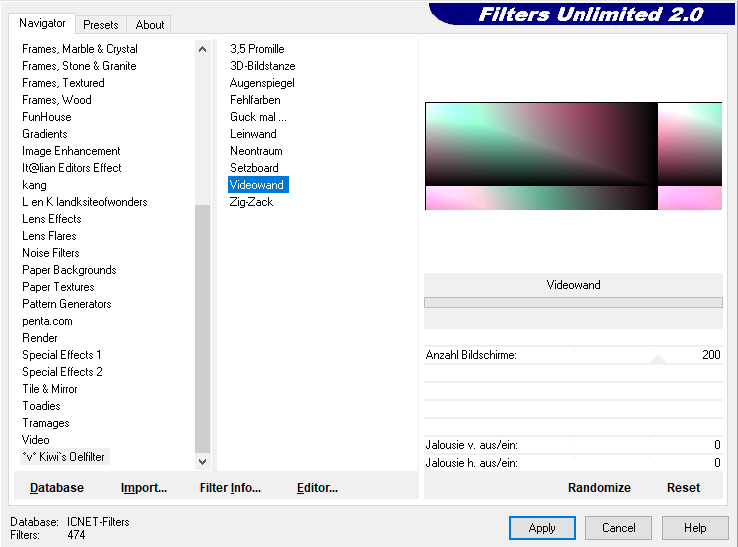
(I have my Kiwi filters imported to Filters unlimited)
Effect Kiwi´s- Zig-Zack with this settings:

Go to effects - image effects seamless tiling with this settings:

Effects-Kiwi´s/ Guck Mal with this settings:

Duplicate this layer
Image - flip to the copy
Drop the opacity to 50
Layers - merge - merge visible
Effect Kiwi´s- Zig-Zack with this settings:


Layers duplicate.
In the copy
go to Effects- Kiwi's effects - videowand with this settings

Change the opacity to soft light in this layer
Go to effects- Artistic effects - balls and bubbles with this settings:

Repeat same settings.
Layers- merge- visible
Now we are going to add our embellishments
elements y/o tube.
Copy and paste the image of your choice
change blend mode to screen or some to fit with your image.
Copy and paste your tube and position in the middle.
Duplicate your tube and change the blend mode to overlay.
Merge- merge visible.
Layer - new raster layer
Fill with a color of your choice
Selections all - modify- contract by 10
delete.
Change the blend mode to hard light or one to fit your tag.
Layers - new raster
Fill with white
Selections all - modify - contract by 2
delete.
layers merge - visible
time to add the copyright and your name.
Avatar
Open an image 200 x 200.
copy merged and paste, your facetime and position that will fit your
Avator size, sharpen once,
Add ypur border like we did in the face time them merged.
Add your copyright and name, merge visible.


No comments:
Post a Comment